Softwoods
A forest is a carbon bank, every tree a deposit.
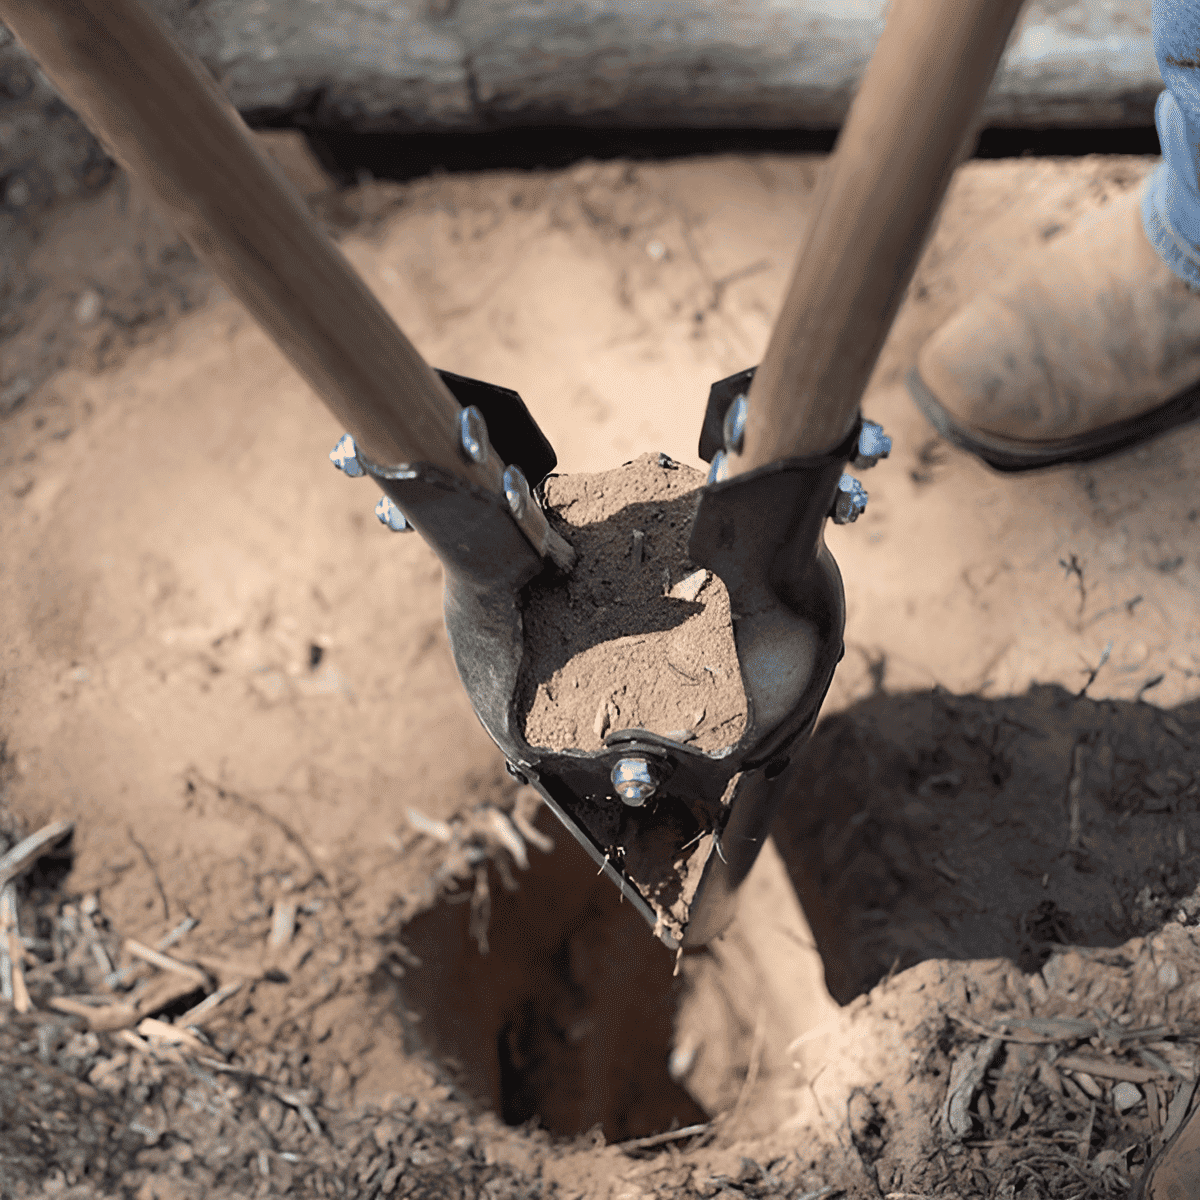
Manually powered post hole diggers are essential tools for creating postholes in the ground without the need for electricity or fuel. These hand-operated devices streamline the process of digging consistent and evenly spaced holes, ensuring a stable and secure fence system. Manual post hole diggers typically consist of two long handles connected by a hinge, with sharp, scooped blades at the bottom designed to penetrate the soil and remove excavated material. By driving the blades into the ground and pulling the handles apart, the digger loosens the soil, which can then be lifted and removed to create the desired hole depth.
There are two primary configurations for manually powered fence post diggers: one-person and two-person diggers. One-person diggers, often called fence post diggers or clamshell diggers, are designed to be operated by a single individual. These tools are generally lightweight and easy to maneuver, making them suitable for smaller fencing projects or areas with limited space. One-person diggers require the user to drive the blades into the ground, spread the handles apart to collect soil, and lift the post hole digger to remove the excavated material. This process is repeated until the desired hole depth is achieved.
Two-person diggers, commonly known as earth augers, require the combined effort of two operators. These manual augers consist of a long central shaft with a helical screw blade, or flighting, at the bottom, which penetrates the soil as the operators rotate the shaft. The flighting displaces the excavated material upwards and out of the hole as the auger is turned. Two-person post hole diggers are more labor-intensive but can be advantageous for creating deeper or wider holes, as well as for tackling denser soil types.
Manually powered fence post diggers provide an environmentally friendly and cost-effective solution for creating postholes. The choice between one-person and two-person diggers depends on the scale of the project, the soil conditions, and the manpower available, with both options offering distinct benefits to cater to different fencing needs.
To dig a post hole, first determine the required depth and diameter of the hole based on the size and purpose of the post being installed. Begin by marking the desired location of the hole and clear the area of any debris or vegetation. Use a shovel or a post hole digger to remove the top layer of grass or soil, creating a shallow depression to guide the digging process. For deeper holes, a post hole auger is recommended, either manual or powered depending on the soil type and your preferences. Insert the digger into the depression and rotate it clockwise while applying downward pressure, allowing the digger to break up and lift the soil out of the hole. Periodically check the depth and diameter of the hole, and continue digging until the desired dimensions are achieved. Once completed, remove any remaining loose soil and debris from the hole before installing the post.
The depth of a posthole depends on several factors, including the height and purpose of the post, the type of soil, and local climate conditions. As a general rule, a post hole should be one-third the length of the post, ensuring stability and proper support. For example, if the above-ground height of the post is 6 feet, then the hole should be at least 2 feet deep. However, this is only a rough guideline, and other factors may necessitate deeper holes for increased stability.
In colder climates, it is crucial to consider the frost line, which is the depth at which the ground freezes during winter. Post holes should extend below the frost line to prevent frost heave, a phenomenon where the frozen ground expands and pushes the post upward, causing it to become unstable. Frost line depths vary depending on geographic location, so it's essential to consult local building codes and guidelines to determine the appropriate depth. Additionally, the type of soil and the load the post will bear may also affect the recommended hole depth. In cases with loose or sandy soil, deeper holes or additional support measures may be necessary to ensure stability.
The width of a post hole depends on the size of the post and the specific requirements of the project. Generally, the diameter of the hole should be approximately three times the width of the post. For instance, if you are installing a 4x4 inch post, the hole should be roughly 12 inches in diameter. This size allows enough space for the post to fit comfortably while providing adequate room for backfilling with soil, gravel, or concrete to secure the post in place.
However, it's essential to consider factors such as the type of soil, the weight the post will bear, and local building codes when determining the appropriate hole width. In some cases, wider holes may be necessary for increased stability, especially in loose or sandy soil. Additionally, local building codes may dictate specific requirements for hole width based on the type of structure being built, so it's always a good idea to consult these guidelines before starting your project.
When securing a fence post in place, there are several options you can use as fill material. The best choice will depend on factors like the type of soil, the fence's intended use, and local weather conditions. However, I can provide a general ranking based on the most common scenarios:
By comparison, the best choice for securing a fence post will depend on the specific circumstances of your project. Concrete is generally the most reliable and long-lasting option, while packed crushed gravel offers a good balance between stability and flexibility. Tamped down earth can work for lighter fences, but sand is typically not recommended.
Calculate the number of post holes you need to dig for a fence.
Copyright © All rights reserved Tree Plantation